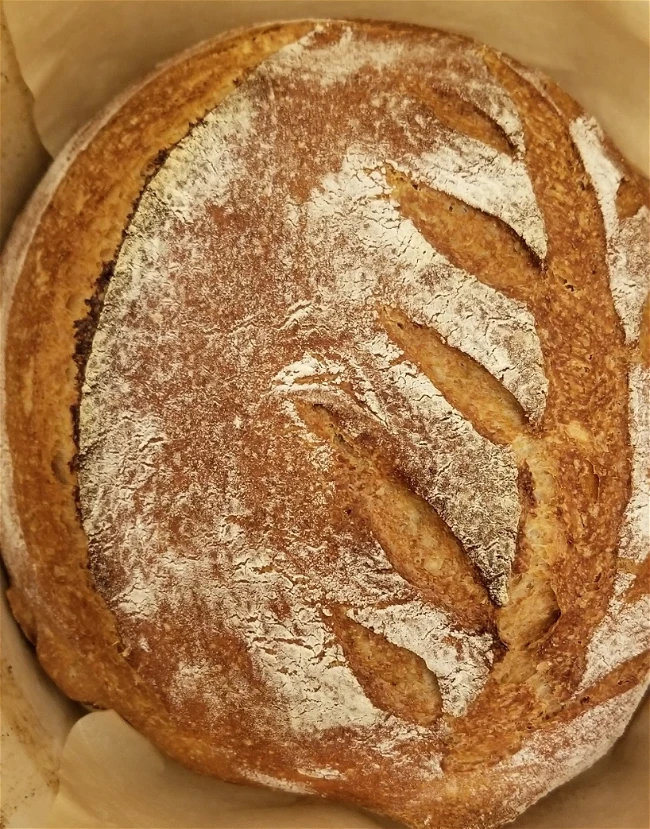
Easy Overnight Red Fife Bread
Red fife is a heritage or heirloom wheat thought to have originated in the Ukraine and brought to Canada in the 1840s. It was the main wheat grown in Canada until the early 1900s, when farmers began crossing it with other varieties. Original red fife wheat then persisted mostly in seed collections (Wikipedia) until the 1980s, when Canadian farmers began growing red fife again and consumer demand for the flavorful wheat grew.
Easy Overnight Red Fife Bread
Rated 3.3 stars by 66 users
Category
Bread
Servings
1 loaf
Prep Time
55 minutes
Cook Time
60 minutes
Red fife bread, compared to whole wheat bread, has an incredible complex taste. It is malty, nutty and the crust on the bread is sweet and buttery. The dough made with red fife rises to greater heights and the crumb is light and fluffy and never dense.

Ingredients
Directions
In a large bowl, add yeast, honey and 1/2 cup warm water together. Mix until yeast dissolves.
Let proof for 5 minutes before sifting in flour and salt
Using a spoon, mix dough until it comes together. If dry and crumbly, add a bit more water.
Mix until dough is soft and pliable and no dry flour is left and the dough keeps it shape without puddling. We do not want a wet soggy dough. It should be softer than play-dough but still hold its shape.
Let it rest for 10 minutes
Punch down dough, and imagine it as if it were a square with four sides. Each side needs to be pulled and folded over once.
Starting from 1 corner, fold dough. Do it again on the other side, and again two more times.
Place dough back in bowl, folded seams down
Cover bowl and set aside to rise for 1 hr in a warm spot in the kitchen,
Punch down dough again and repeat the four fold. Starting from 1 corner, fold dough. Do it again on the other side, and again two more times.
Put in to the fridge for a minimum of 3 hours, but overnight is best
2 hours before you want to bake, take the dough out the fridge.
Punch down dough again and repeat the four fold. Starting from 1 corner, fold dough. Do it again on the other side, and again two more times.
Let it rest for a half hour
In a proofing basket or a large plate, line with parchment paper, long enough that you can lift the dough with it.
Dust the entire ball of dough with a good layer of flour, and place in to proofing basket or plate. Place a cloth or plastic sheet over top of the loaf,
Let rest for an hour
After an hour, preheat oven to 475’F and place the dutch oven with lid, in to preheating oven.
While oven is preheating, lightly dust a bit more flour on top of the dough.
With a dough blade or very sharp knife, score your bread. You can Google some ideas.
Once oven is fully preheated, using oven mitts, carefully take dutch oven out of the oven and remove lid
Moving quickly, carefully grab both ends of the parchment paper to lift your dough up off the plate/proofing basket, and in to the dutch oven.
Secure lid on, and place back in to the oven with oven mitts.
Bake for 30 minutes
Remove lid after 30 minutes, your dough will have risen but look pale.
Bake for another 15 minutes without the lid. This will create the golden crust.
Remove from oven after 15 minutes and carefully, with a spatula, lift dough from dutch oven and place on a cooling rack.
Let fully cool a minimum of 1 hour before slicing
Recipe Note
**You will need a dutch oven to do this recipe. Preferably not ceramic so it doesn’t crack from the high heat. This is important for making a good crust on the dough**
